
Quick Start
This guide will walk you through the steps to add Skygear to your Android project from scratch.
Alternatively, you might want to get started with Skygear using:
Prerequisite
- Android Studio
- A Skygear account. Sign up here.
Step 1: Install the Skygear Android SDK
- Create a new Android Studio project or use your existing one.
- In
build.gradleof the project, include the JCenter Maven repository.
allprojects {
    repositories {
        jcenter()
        maven {
            url 'https://maven.google.com/'
            name 'Google'
        }
    }
}
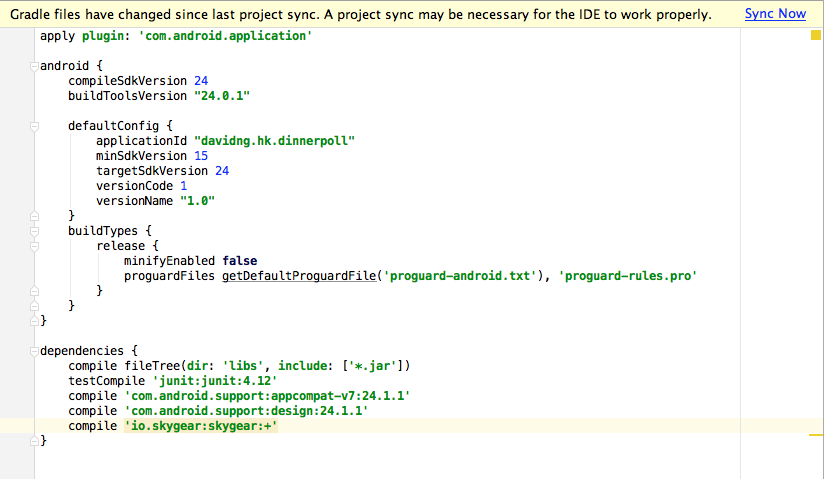
- Then, in
build.gradleof the module, add Skygear as a dependency by addingio.skygear:skygear+in the dependency list.
dependencies {
    // other dependencies
    compile 'io.skygear:skygear:+'
}
- You will be hinted for a project sync as you have updated the
gradlefiles. The Skygear Android SDK will have been installed when the sync is completed.
Step 2: Configure Skygear in your app
Method 1: Create an Application that extends SkygearApplication
If your existing project does not have any extension, you can configure Skygear by creating an Application that extends SkygearApplication.
Assume you already have your custom application defined in MyApplication.java (if not please create one), add the following lines to the file.
import io.skygear.skygear.SkygearApplication;

public class MyApplication extends SkygearApplication {
    @Override
    public String getSkygearEndpoint() {
        return "https://<your-app-name>.skygeario.com/";
    }

    @Override
    public String getApiKey() {
        return "<your-api-key>";
    }
}
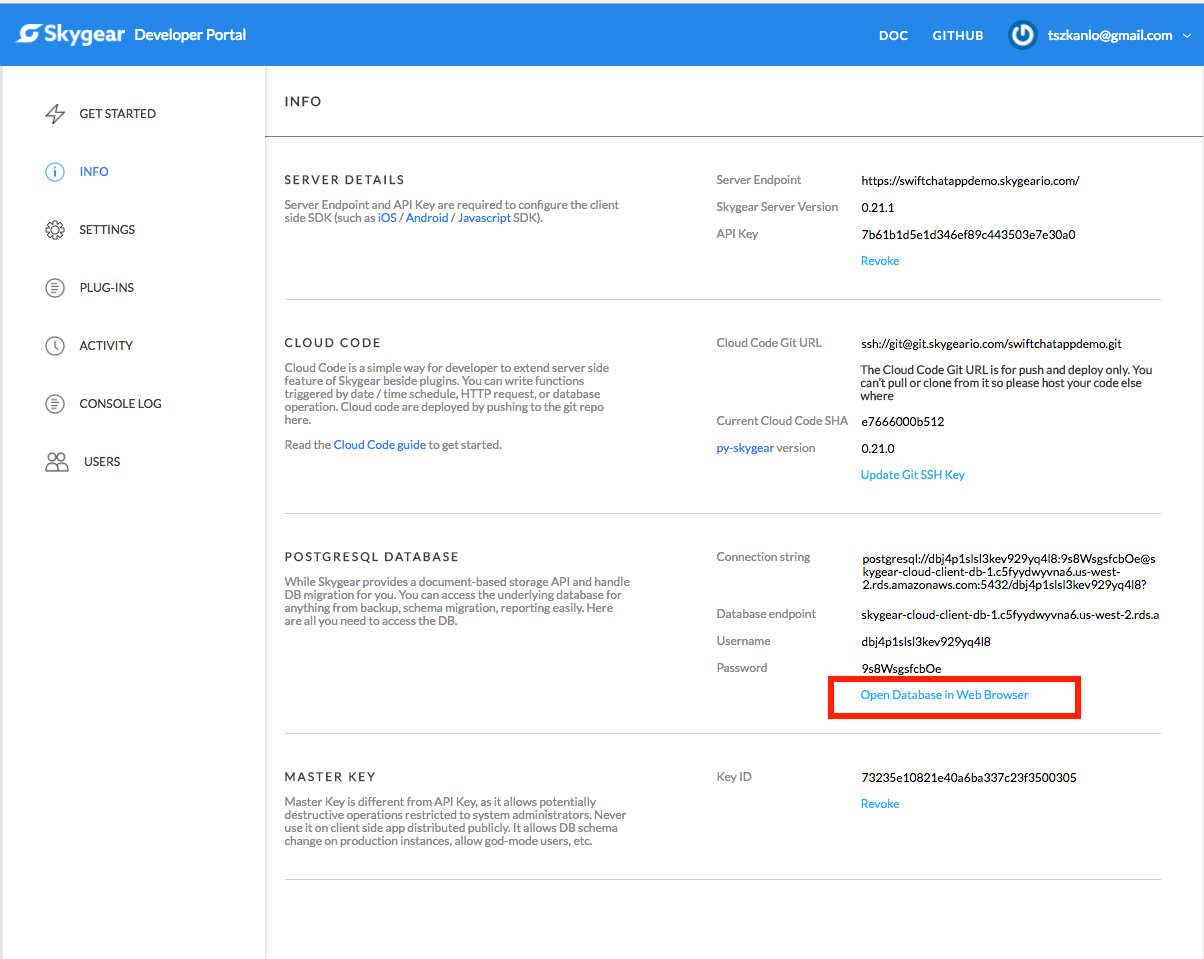
You can get your server endpoints and the API keys in the info page in your developer portal after signing up for the Skygear Cloud Services.
Method 2: Configure Skygear when the app starts
If you already have your own custom applications, you can configure Skygear in the onCreate function. Your MyApplication.java should look like this:
import io.skygear.skygear.Container;
import io.skygear.skygear.Configuration;

public class MyApplication extends Application {
    @Override
    public void onCreate() {
        super.onCreate();

        Configuration config = new Configuration.Builder()
                .endPoint("https://<your-app-name>.skygeario.com/")
                .apiKey("<your-api-key>")
                .build();

        Container.defaultContainer(this).configure(config);
    }
}
You can get your server endpoints and the API keys in the info page in your developer portal after signing up for the Skygear Cloud Services.
Step 3: Update the app manifest
For the Skygear Android SDK to work, make sure the following two items are set in AndroidManifest.xml.
- Include the
android.permission.INTERNETpermission. (So that the Skygear Android SDK can communicate with the Skygear server) - Specify the main Activity Class (an activity subclass) as the
android:nameattribute at the activity tag.
// Your AndroidManifast.xml should have the followings lines

<uses-permission android:name="android.permission.INTERNET" />
<application
    android:name=".MyApplication">
</application>
That is it. You are good to go now. You can continue with the step below to learn about basic database operations.
Step 4: Create your first record in Skygear
Now, let's create a record in the Skygear database to see if the SDK has been installed successfully.
Add the following lines in the onCreate function and run your app in a simulator. The record will be created when you run your app.
Practically the codes should not be structured this way. It is for demo only.
// import the modules
import io.skygear.skygear.AuthResponseHandler;
import io.skygear.skygear.Error;
import io.skygear.skygear.Record;
import io.skygear.skygear.RecordSaveResponseHandler;
import io.skygear.skygear.SkygearApplication;
import io.skygear.skygear.Container;

// Every record in Skygear must be owned by a user
// For testing purpose, we have used signupAnonmously to create a record
// Visit the user authetication documentation to learn more
// https://docs.skygear.io/guides/auth/basics/android/
@Override
public void onCreate() {
    super.onCreate();
    final Container skygear = Container.defaultContainer(this);
    skygear.getAuth().signupAnonymously(new AuthResponseHandler() {
        @Override
        public void onAuthSuccess(Record user) {
            Log.i("MyApplication", "Signup successfully");

            // Create Record Type "test" and put "Hello world" as value of key "content"
            // Advanced: Skygear Server will create a table "test" and appropriate
            //           columns in PostgreSQL in Development mode.
            Record test = new Record("test");
            test.set("content", "Hello world");

            skygear.getPublicDatabase().save(test, new RecordSaveResponseHandler() {
                @Override
                public void onSaveSuccess(Record[] records) {
                    Log.i("MyApplication", "Record saved");
                }

                @Override
                public void onPartiallySaveSuccess(Map<String, Record> successRecords, Map<String, Error> errors) {
                    Log.i("MyApplication", "Some records are failed to save");
                }


                @Override
                public void onSaveFail(Error error) {
                    Log.w("MyApplication", "Failed to save: " + error.getMessage(), error);
                }
            });
        }

        @Override
        public void onAuthFail(Error error) {
            Log.w("MyApplication", "Failed to signup: " + error.getMessage(), error);
        }
    });
}
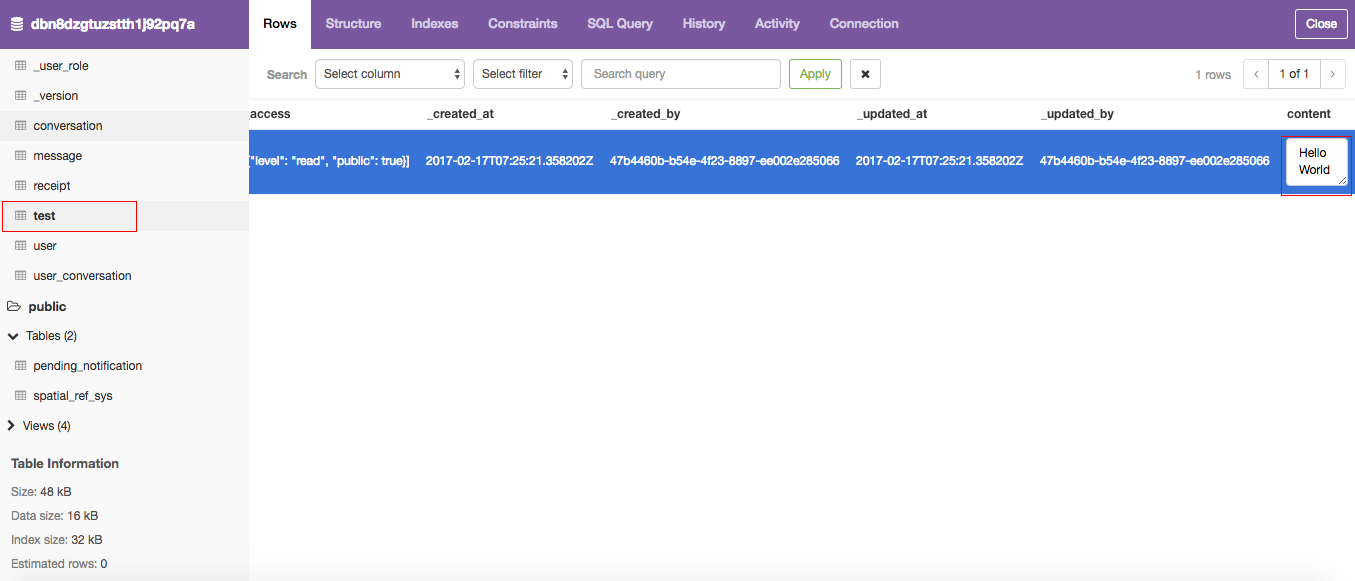
If the record is created successfully, you should see the record "Hello World" in your database table "test".
You can access your database using the data browser we provide. It can be found in the info page in your developer portal.
This is how your data browser will look like.
You can access Skygear database in 3 ways.
- Web data browser: It can be found in from info page in your developer portal.
- PostgreSQL client: Skygear database can viewed in any PostgreSQL client. Get the connection string from the info page in your developer portal. We recommend using Postico.
- Skygear CMS: Skygear CMS is a business-user friendly web interface that allows users to edit the data in the database. To use the CMS, you have to enable it in the plug-ins page in the developer portal. Your CMS URL is
https://insert-your-app-name.skygeario.com/cms.
Hurray! Everything should be in the right place from here.
What's next?
Next, you may want to learn more about: