
You are viewing Skygear v1 Documentation.Switch to Skygear v0 Documentation
Skygear Chat Quick Start
Follow the steps below to add Skygear Chat to your app.
Step 1: Add Skygear Core to your app
Skygear Core provides you the cloud database and the user authentication modules. They are required modules for Skygear Chat.
Follow the iOS quick start guide to add Skygear Core to your app if you haven't.
Step 2: Add Skygear Chat to your app using CocoaPods
- Go to your
Podfileand add the following lines to includeSKYKItChat(Skygear Chat SDK) in your project.
# This line should exists after you follow the iOS Quick Start guide
pod 'SKYKit', '~> 1.5'

# Add this line
pod 'SKYKitChat', '~> 1.5'

# If you want to use UIKit too, include this line:
# pod 'SKYKitChat/UI', '~> 1.5'
Note: It is not a must to specify the version number (i.e. 1.1). If you don't, your app will be using the latest SDK version automatically. Check out all the version numbers here.
- Save your
Podfileand runpod installin the terminal.
pod install
- Then in
AppDelegate.morAppDelegate.swift, import the Skygear Chat SDK.
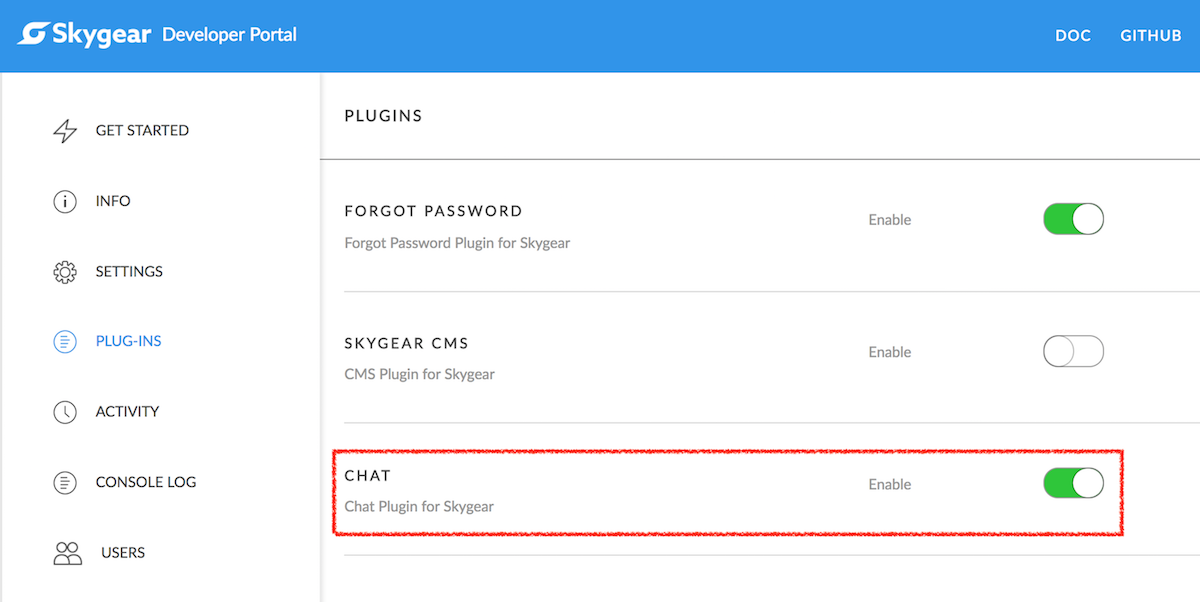
Step 3: Enable the chat in your developer portal
Lastly, enable the chat module in your developer portal. It is in the plug-ins page.
Cool your are all set now.
What's next from here
You got the basic. Next, learn more about:
- Skygear Chat
- Skygear User Authentication
- Skygear Chat UIKit for iOS (common chat UI elements)
- Chat demo projects for iOS