
Email Verification
Skygear allows you to verify your user's email through the email verification APIs.
When email verification is turned on, Skygear will send an verification email to any new sign-ups automatically. To verify your users, you can either ask your users to click on a verification link, or input a verification code listed in the email into the app.
In the developer portal, you can customize the verification email template, the success page and the error page.
The email verification email will only be sent to users who sign up after the module is enabled. If you also want to verify users signed up before the module is enabled, you can verify their emails by calling the requestVerification function manually.
Quick start
- Go to Skygear Portal.
- On the left menu, click User Auth, then click User Verification.
- Complete General Settings for user verification and save.
- Enable email verification in Email Verification tab, complete the settings and save.
User verification is available to Skygear Server 1.6.1-6 or later. If you cannot find User verification in the left menu, upgrade your app.
Implications to the user record
When email verification is enabled, Skygear will send an email verification email to all new sign-ups using the email stored in their user records (i.e. the email field).
Besides, 2 additional fields will be added to the user records: email_verified and is_verified.
-
email_verifiedequals totruewhen a user's email is verified. -
is_verifiedequals totruewhen the verification condition is met. Since Skygear provides also SMS verification, if both email and SMS verification are enabled, you can mark users as verified only when both email and phone number are verified. You can set the condition in the general setting page. Skygear uses this field to identify if a user is verified.
General settings
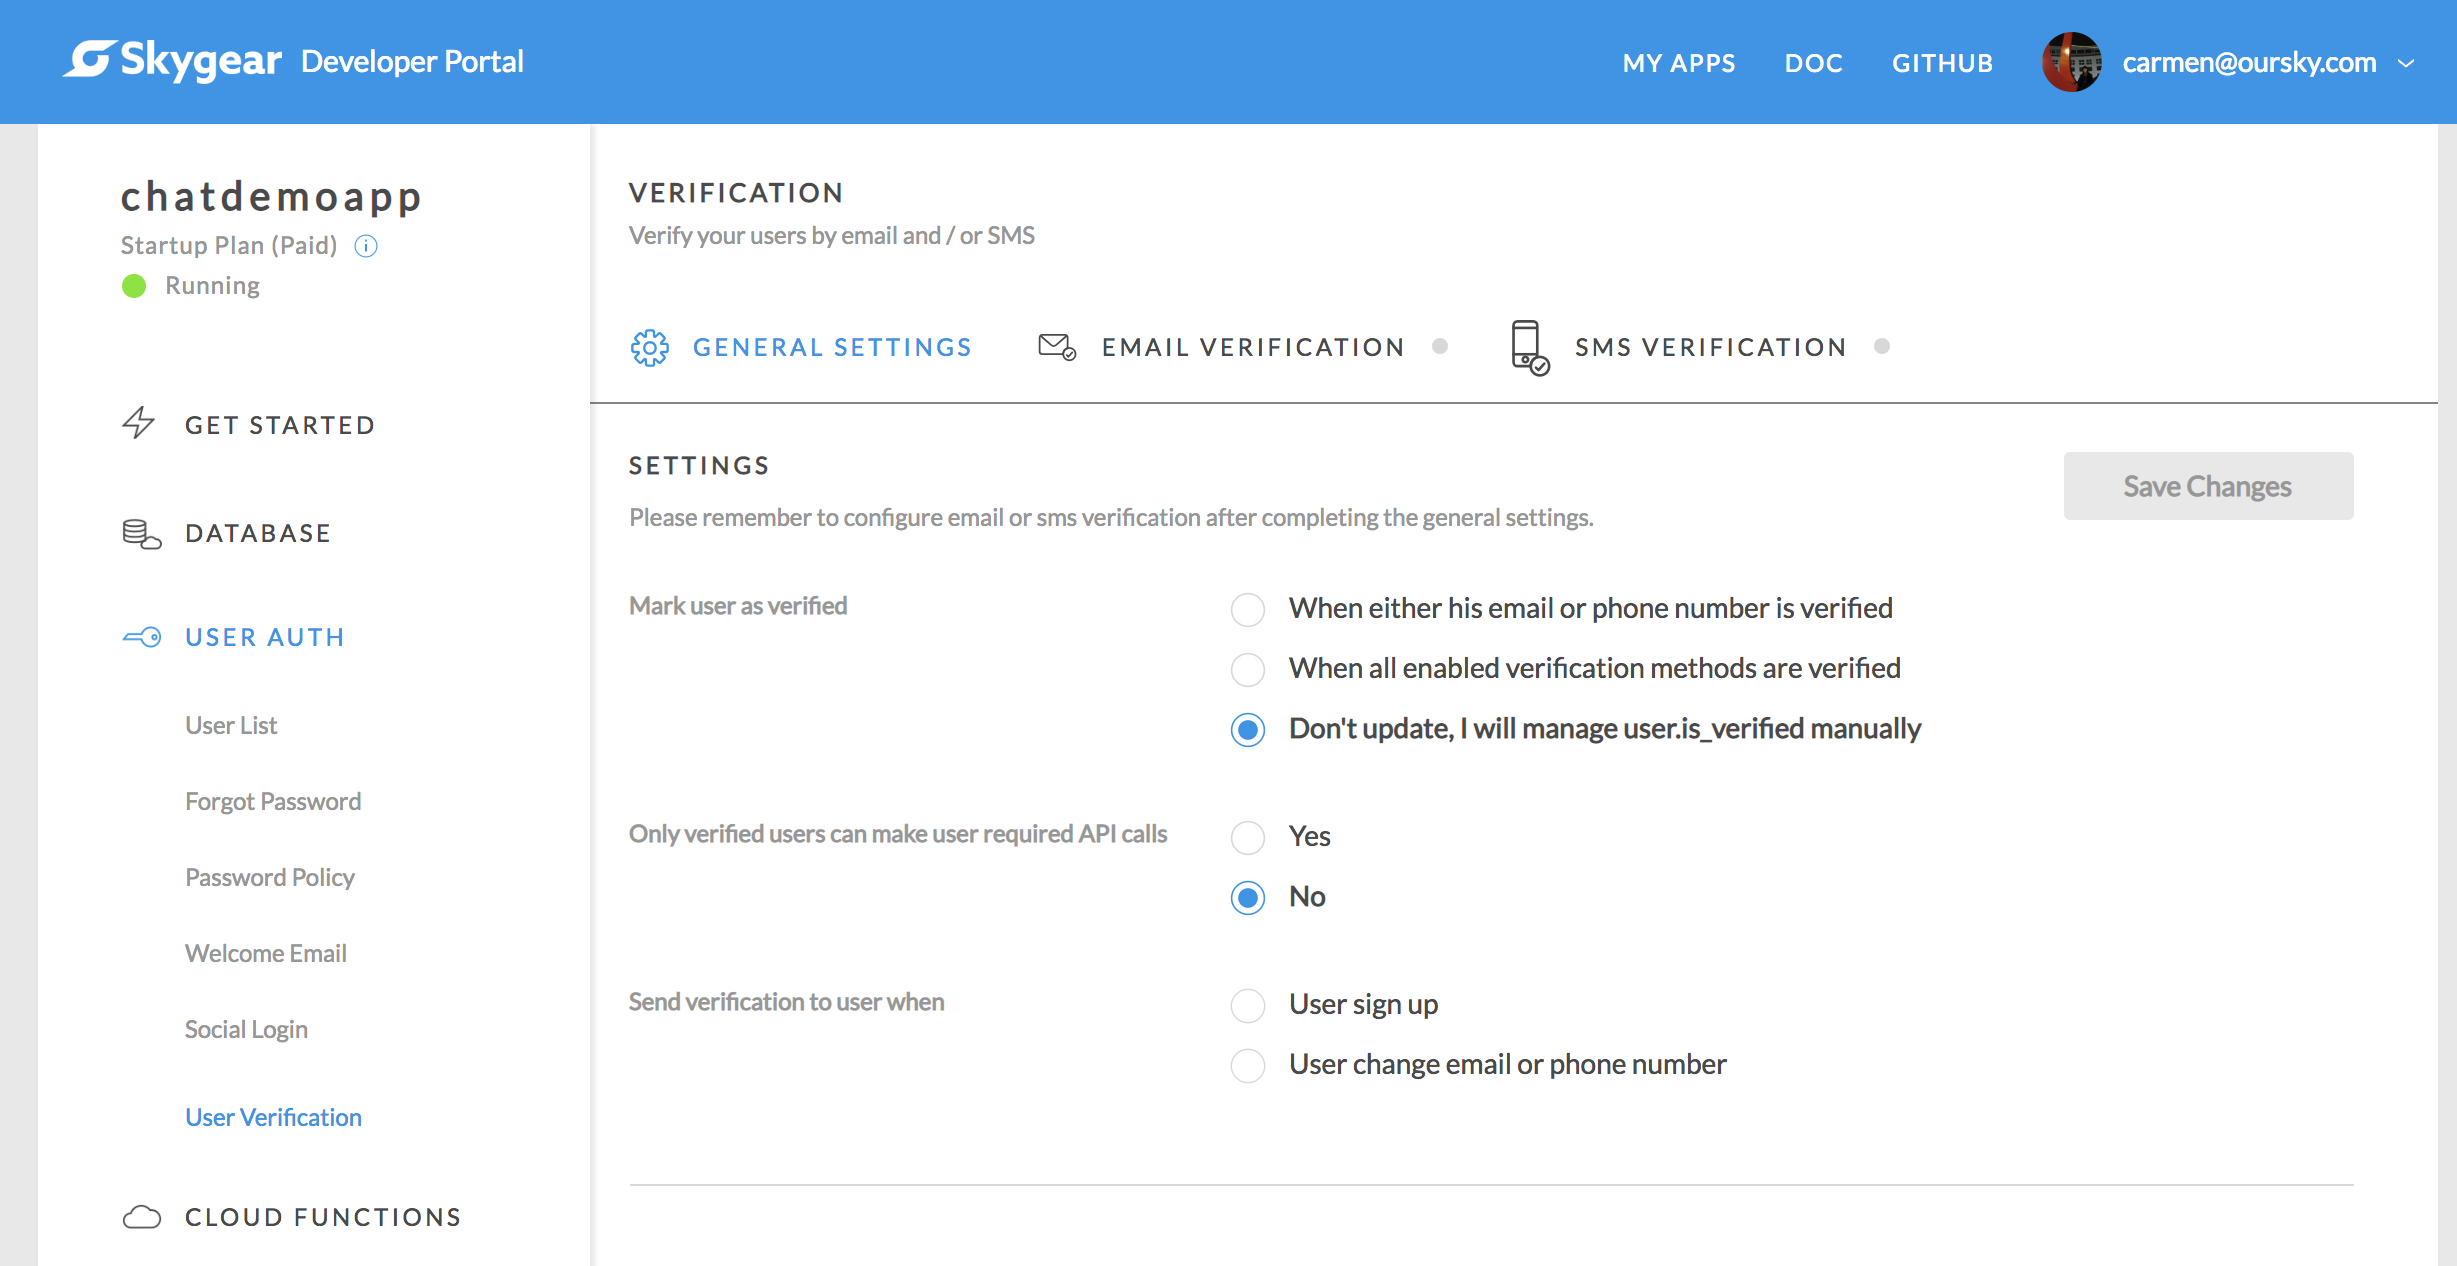
There are three settings in general settings:
-
Mark user as verified - Skygear used
is_verifiedfield in user record to identify if a user is verified. This setting help you to updateis_verifiedin different scenarios. -
Only verified users can make user required API calls - If turns this on, only users whose
is_verifiedistruecan call the user required API. e.g. Record save, user required lambda, etc. -
Send verification to user when
- User sign up - Send verification email when user sign up.
- User change email or phone number - Send verification email when user's email is changed.
- You can also trigger sending verification email in your application by
calling
requestVerification('email')API.
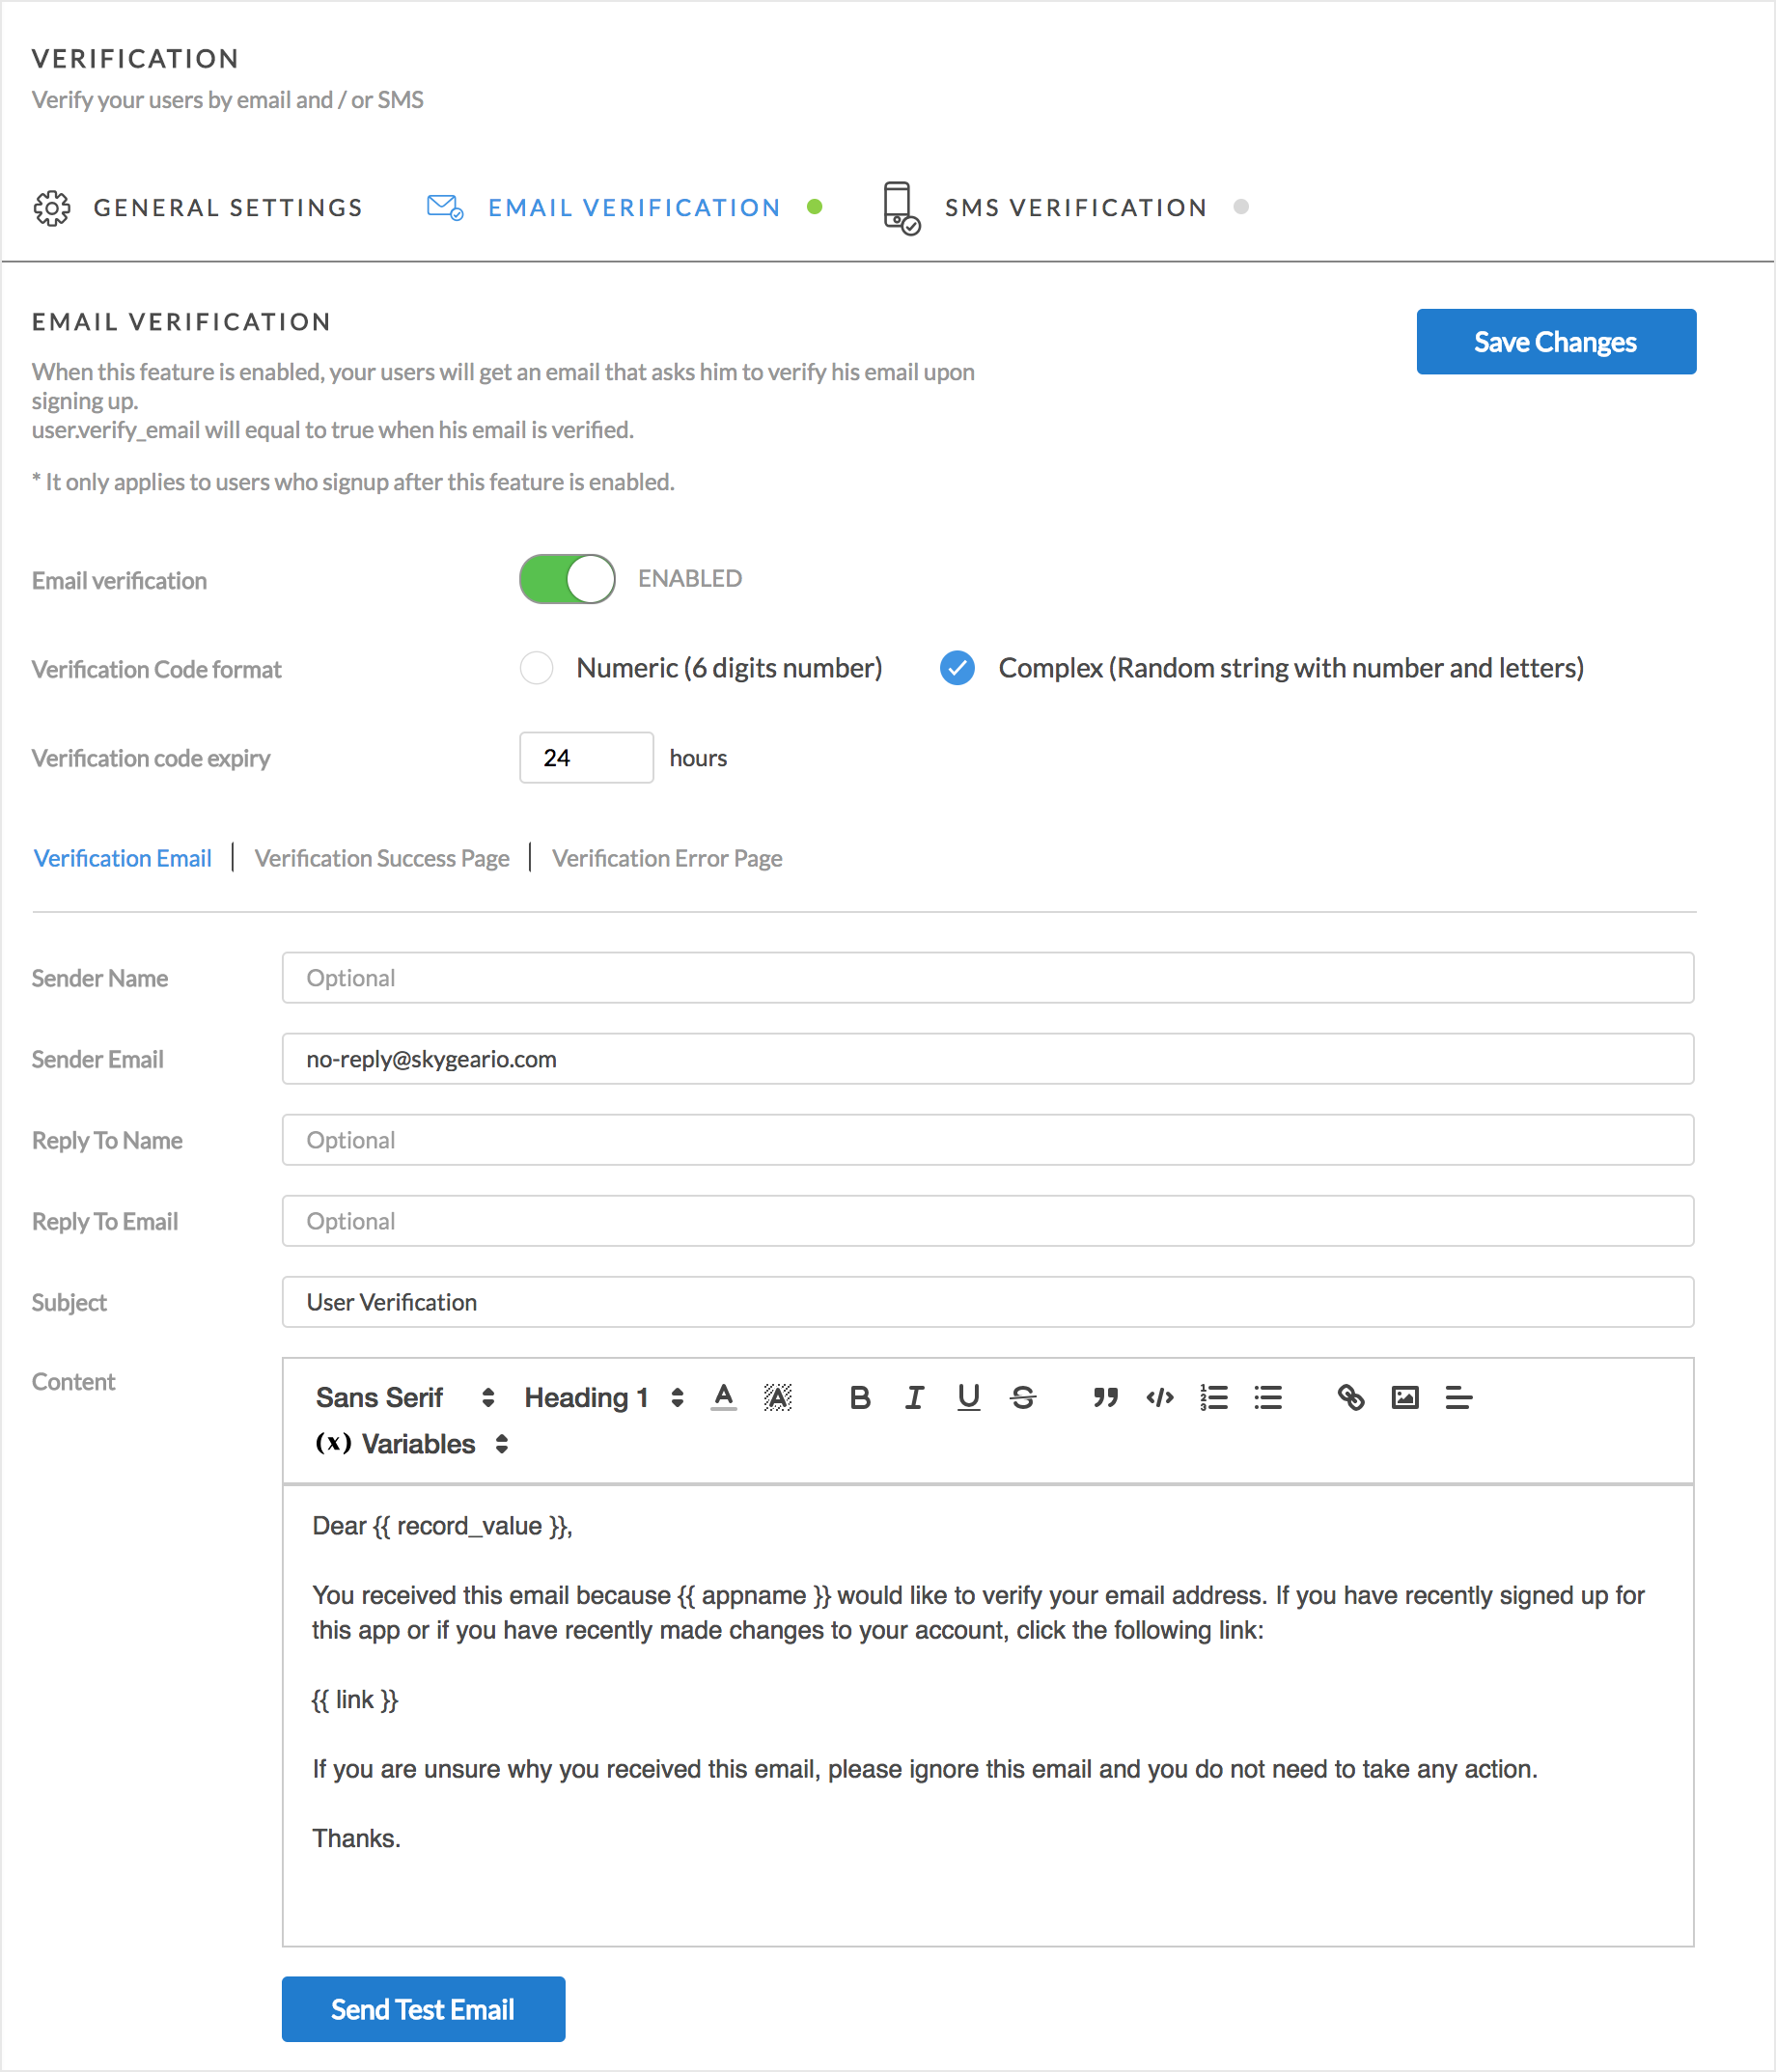
Email verification settings
Enable email verification in Email Verification Settings.
You can customize the verification email content, success and error handling here.
-
Verification Code format
- Numeric (6 digits number) - Suitable for user to input verification
code in your application. You can verify the code by calling
verifyUserWithCodeAPI. - Complex (Random string with number and letters) - Suitable for verification link
- Numeric (6 digits number) - Suitable for user to input verification
code in your application. You can verify the code by calling
-
Verification code expiry - Verification code will be expired in the given hours
Customizing the verification email
As mentioned, you can either provide a verification link or a verification code in the email.
To provide a verification link, simply add the Verification Link variable to the email; to provide a verification code, add the Verification Code variable to the email.
There are other variables you can use in the email template. Check it out at the Developer Portal.
If you want to verify your user with a verification code, you need to call the verifyUserWithCode API in your app.
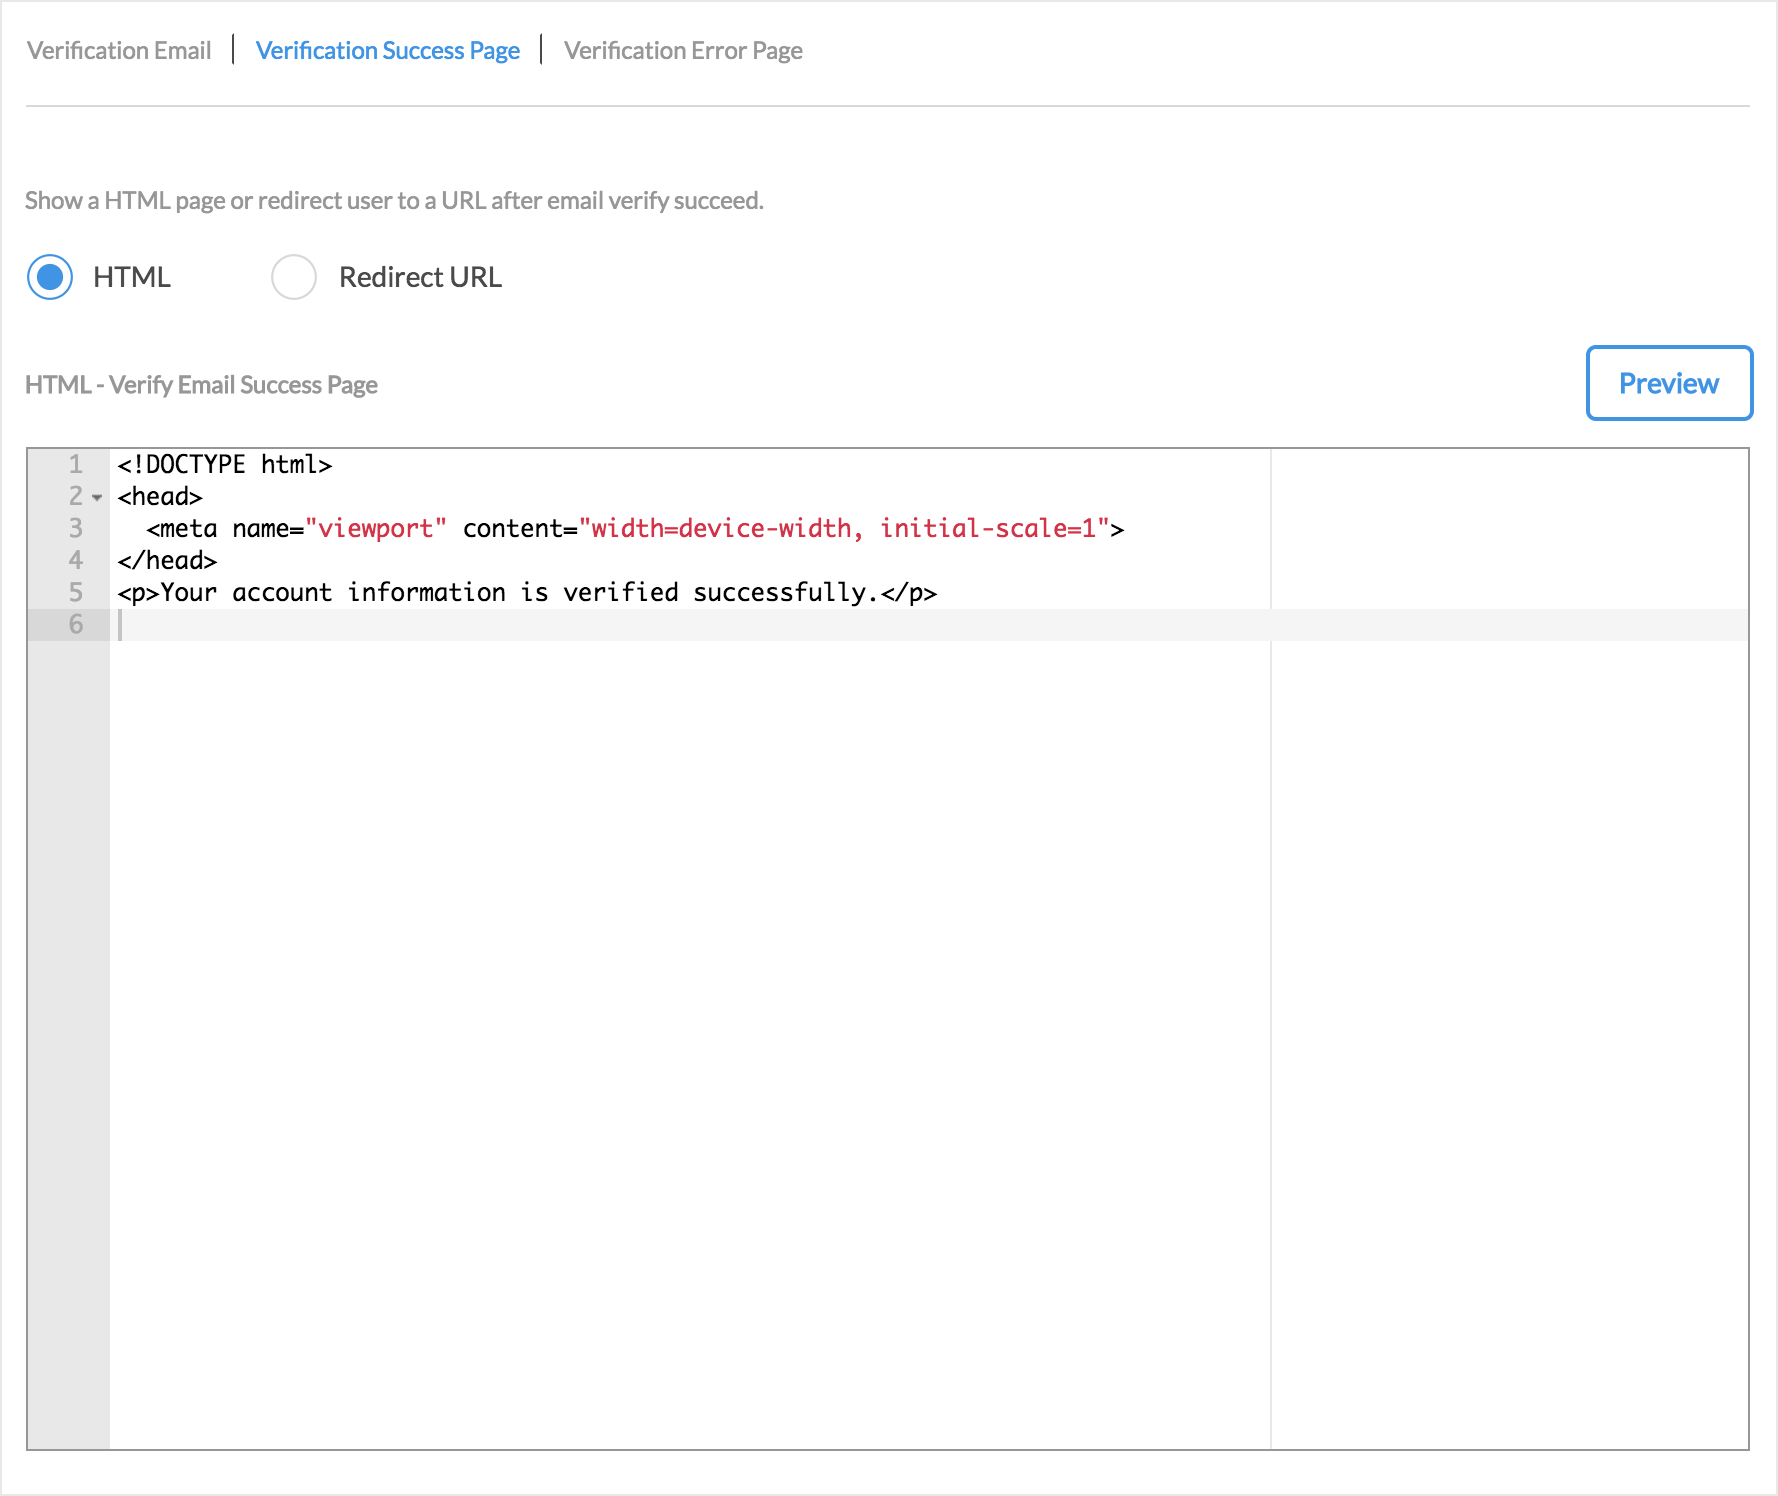
Customizing the verification success page
After user click the verification link in the email and verify successfully. An successful page will be shown and you can customize the page HTML here. To redirect user to another page instead of showing the successful page, please select Redirect URL and input the URL.
Customizing the verification error page
Similarly, if user fail to verify through the verification link. An error page will be shown, you can customize the page HTML in Verification Error Page. To redirect user to another page instead of showing the error page, please select Redirect URL and input the URL.

Requesting email verification manually
You can request verification email in your application through API.
skygear.auth.requestVerification("email").then(function () {
  console.log("you should receive verification code soon");
}, function(error) {
  console.error(error);
});
Verifying users with a verification code
Instead of using verification link, you can do the verification in your application through verify API with the verification code.
var code = "User input verification code";

skygear.auth.verifyUserWithCode(code).then(function (user) {
  console.log("verify successfully");
  console.log("user record", user);
}, function(error) {
  console.error(error);
});